
Table of Contents
First, we may need to ask ourselves why we need to password protect our storage drives. We typically use storage drives for saving crucial data. We don’t want our storage drives to get into the wrong hands, causing a threat to our privacy. Hence we need to password protect and encrypt it. This is a good idea and actually the fastest and easiest way to protect your data on a storage drive.
There are different ways to password protect storage device drives on Windows 10. First, we may use third-party software such as SanDisk USB, mainly for Sandisk USB drives, EaseUS file encryption software, WinRAR, Rohos Mini, etc. The main disadvantage of using third-party software is you need to format the drive before protecting it. They are also not free.
Let’s understand the risk of not password protecting your drive. Take an example of a USB drive. You may give out your USB drive to a colleague, and since most people tend to format USB drives before using them, your crucial data may be lost. Why spend a lot of time trying to recover this data that might actually destroy your USB drive? It’s the best way to make sure that your colleagues have the right permissions on using your USB drive.
There is no need to use third-party software to password protect your USB drive as there is Windows 10 built-in tool called BitLocker. Let’s see how to password protect your USB drive using BitLocker.
What is BitLocker To Go?
BitLocker To Go is an encryption method of restricting users’ access to removable drives in Windows. BitLocker To Go’s best advantage is that it supports most file systems such as FAT, FAT32, NTFS, exFAT. Any USB drive with these file formats can be password protected with BitLocker To Go.
To view BitLocker on Windows 10, press the Windows button and search for BitLocker. Press enter, and the settings window should open.
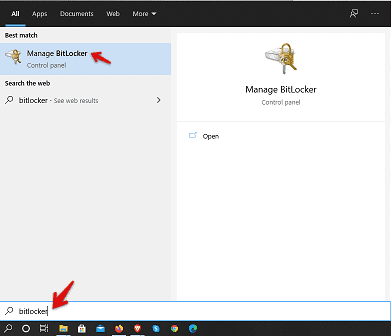
BitLocker Search
Step by Step procedure on how to use BitLocker
Step 1: Connect your working flash drive to your Windows 10 PC. To make sure that the flash is connected and ready to use. You will be able to see it under file explorer -> This PC is shown below.
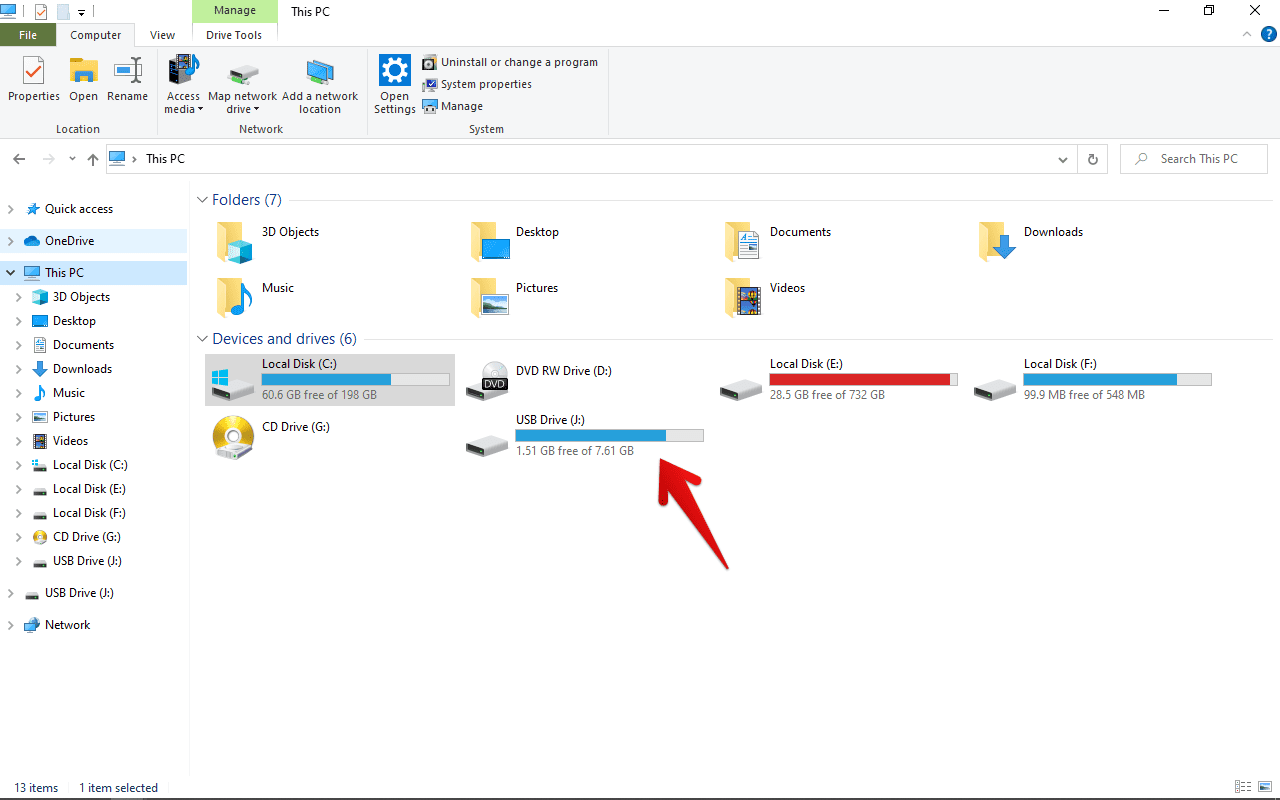
USB Drive Disk
Step 2: Upon opening the BitLocker settings, turn on Bitlocker under the USB Drive section.
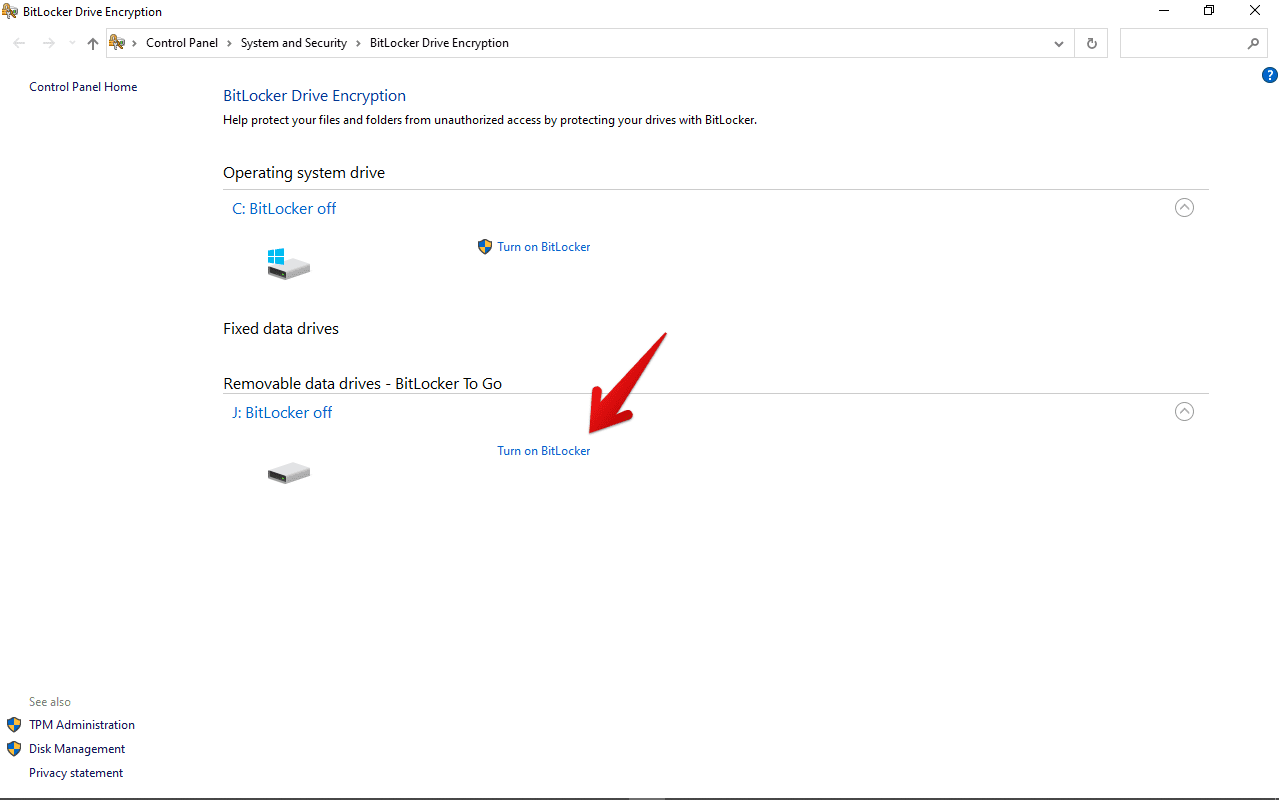
Turn on BitLocker
At times this second step might change depending on the version of Windows you are using. Alternatively, you can right-click on the USB drive and choose the turn on the BitLocker option.
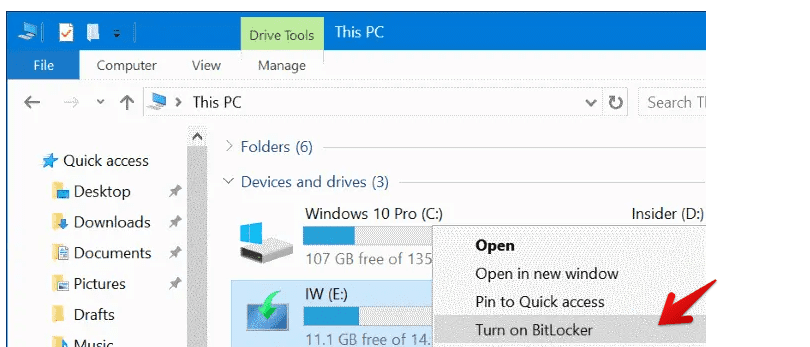
Turn on BitLocker Option
Step 3: Upon turning on BitLocker, a pop-up window will appear, prompting you to enter your password and re-enter your password. Enter these two fields and click the next button at the bottom right corner.
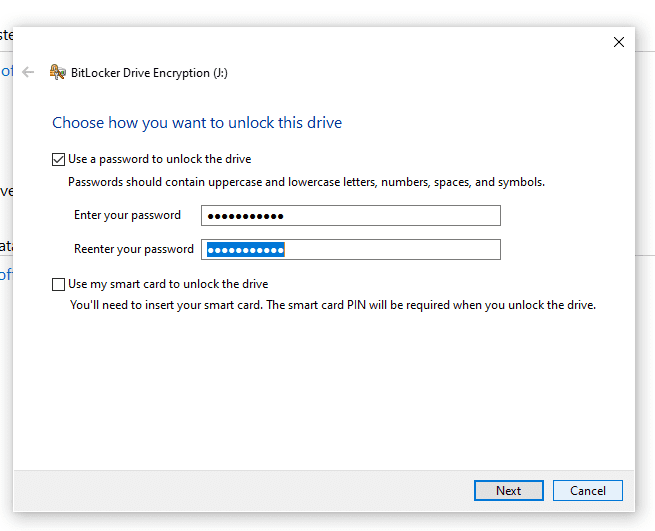
Enter Password
Step 4: The fourth stage is to choose how you want to save your recovery key. In case you forget your BitLocker password, you can use the recovery key to reset and create a new password. This is another strong feature since the key is unique, and without the key, no one can reset the USB drive password.
Choose the best and the most convenient method to save your recovery key and click next.
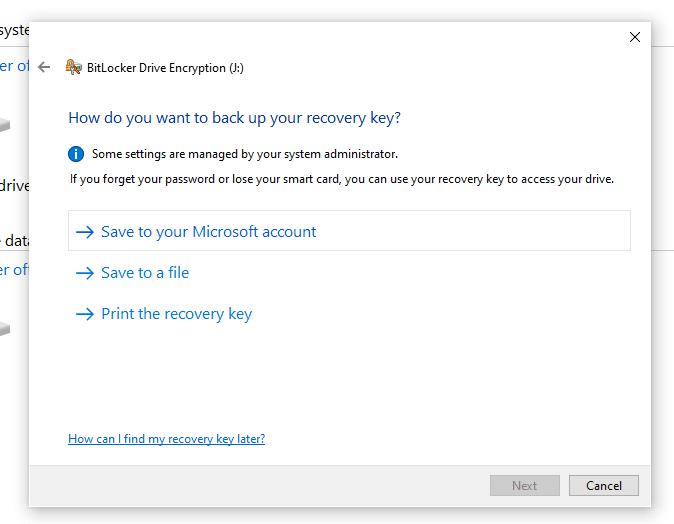
Recovery Key
Step 5: This stage allows you to choose the type of encryption you want. If you need to encrypt the whole USB drive, option two works best, but if you need to encrypt the used space, only option one can work best. The choice depends on your goal of encryption. Choose your preferable encryption method and click next.
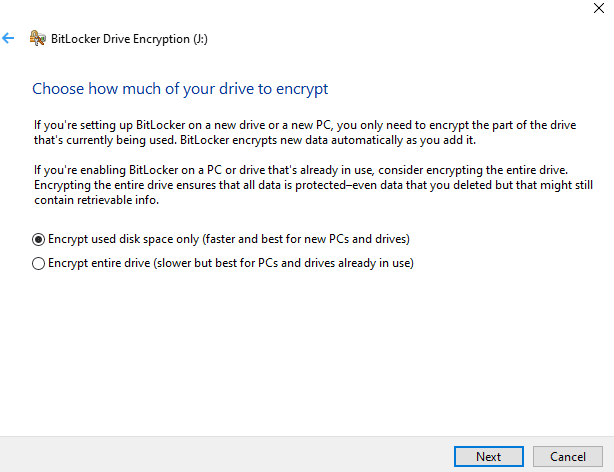
Encryption size
Step 6: Here, you choose the encryption mode. As Microsoft updates its Windows 10 operating system, new encryption modes are also introduced. If you only need to use the USB drive on Windows 10 version 1511 and above, you can choose the first option. Otherwise, if you will use the encrypted flash in other Windows versions, it’s good to use the compatible mode.
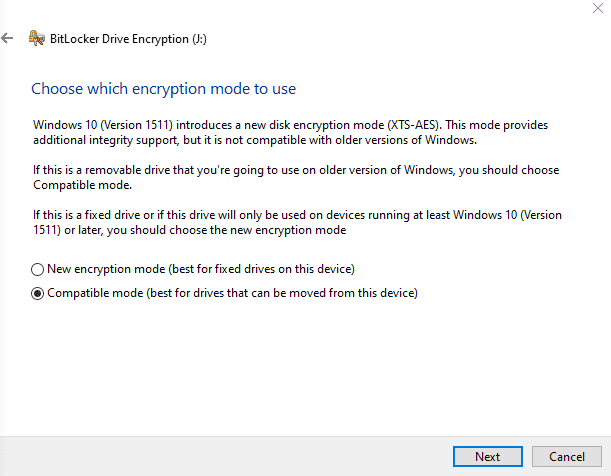
Encryption mode
Step 7: Finally, start your encryption and set the password. Your flash drive is fully protected with a password.
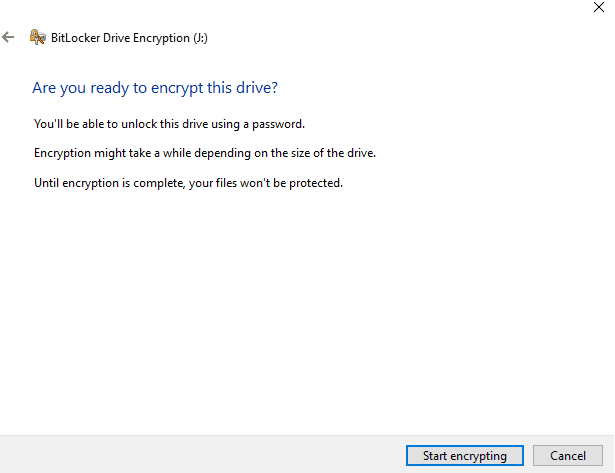
Start Encryption
This stage might take a while, depending on the size of your USB drive.
Step 8: The last stage is a completion message. If your USB were successfully protected, you would get a dialog box, as shown below.
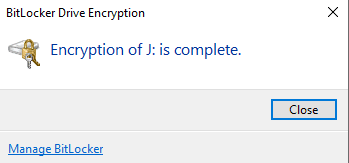
Encryption Successful
Conclusion
To turn off BitLocker password protection. Go to Bitlocker settings, select the drive you had encrypted and click the turn-off option. You can also change the Bitlocker password or remove the password.
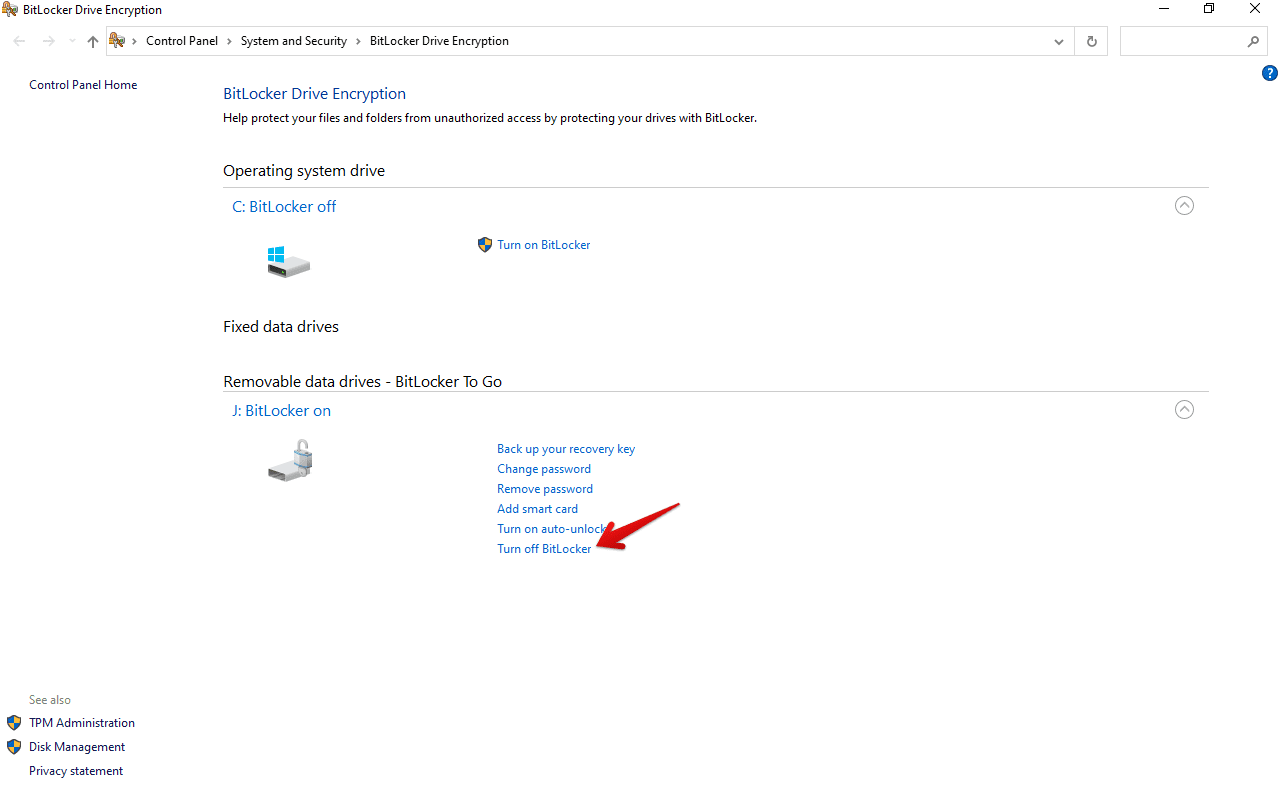
Turn off BitLocker