
Table of Contents
Due to rapid technological improvements, tablets and touchscreen devices are taking over slowly, making it seem like cursors have turned out to be less critical. However, if you still have your desktop PC or laptop, you still see the value of having a cursor as it performs most primary functions.
Microsoft Windows comes with a built-in set of cursors that you can choose from. However, if you feel the default set of pointers does not meet your needs and would like to replace them with your own customized set, no need to worry since this article will help you.
Microsoft allows its users to customize the operating system to their liking, including installing and changing mouse pointers. Depending on the users’ preferences, they can change the mouse pointer color, appearance, shape, and many more. Thanks to Microsoft since they have provided a wide range of customization features to use.
What is a mouse cursor?
This is an indicator that displays the current point of user interactions and movements. A cursor does the same work as a touch screen stick or finger on touch screen devices. In Windows 10, the user can make changes to the cursor to suit their needs. Besides, a user can also install custom mouse cursor schemes alongside the default ones provided by Microsoft.
If you want to install and change the way your new mouse pointer looks and feel, you can do so on two fronts:
- Install a mouse pointer cursor them
- Manually set specific pointers for your mouse cursor
This article tutorial will guide you through installing, changing, and customizing your mouse and cursor pointers in Windows 10. Therefore, please read it to the end to get a glimpse of how nice it feels having customizable mouse pointers at your disposal. Remember, you don’t need to worry and beat yourself up since the process is easier than you might think.
Note: Regardless of the Windows version you are using, mouse cursor theme installation is similar across the board. For instance, this article guide mainly focuses on installing new mouse pointers in Windows 10, but the same direction can be used for other Windows versions such as Windows 7, 8, and 8.1.
Installing new mouse pointers in Windows 10
Prior to installing the custom mouse pointers, we first need to acquire or download the custom mouse pointers that we shall use on our Windows 10 OS. The internet contains thousands of custom mouse pointers you can choose from depending on your preferences. If you don’t know what to do, then use the links that I will provide to download a preview of custom mouse pointers.
Download the best mouse pointer to your Windows 10 operating system before proceeding to the next phase.
Note: Mouse cursor themes are archived; hence you will require an unzip program to unarchive the files. If you don’t have one and the built-in Windows 10 extractor fails, download 7-zip, an open-source unzip software.
Once you have an unzip program installed on your Windows 10 OS, extract the downloaded mouse cursor scheme, in this case, “Metro X”.
To extract the downloaded file, locate it on your PC, then right-click on the downloaded file and select the Extract all button as shown in the image below:
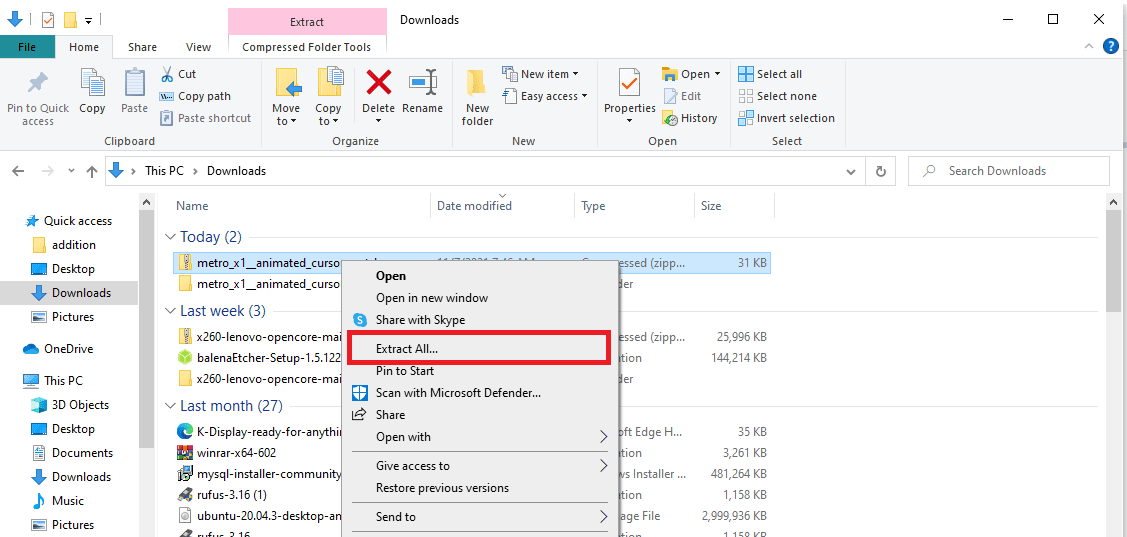
Click extract all
The unzip program will extract all the contents from the archived folder.
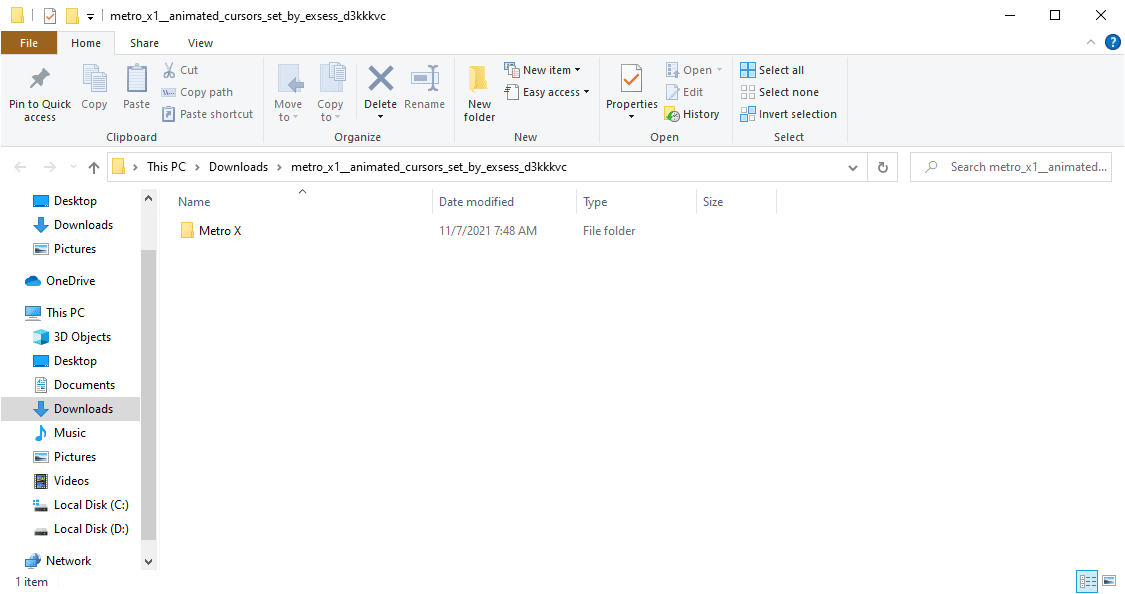
Metro X mouse cursor scheme
Note: If the built-in extractor fails to extract the downloaded mouse cursor scheme, then try using another extractor program like the 7-zip that we downloaded above.
After successfully extracting files from the downloaded mouse pointer scheme, locate the installer file from the mouse cursors folder.
Tip: To quickly locate the files, check the “Show files” option while extracting. This option simplifies the process of finding the files. Once the extraction process is complete, the extractor will show the extracted files automatically.
You might be wondering which is the installer file among all the files in the mouse cursor folder. First, locate a file that contains a .INF extension. Occasionally if you try and use the name, you might fall into errors since the name can change. For instance, some users claim they found “Autorun.inf”, while others say they found “Install.inf). Hence, to be safe, try and locate it using the file extension name (INF).
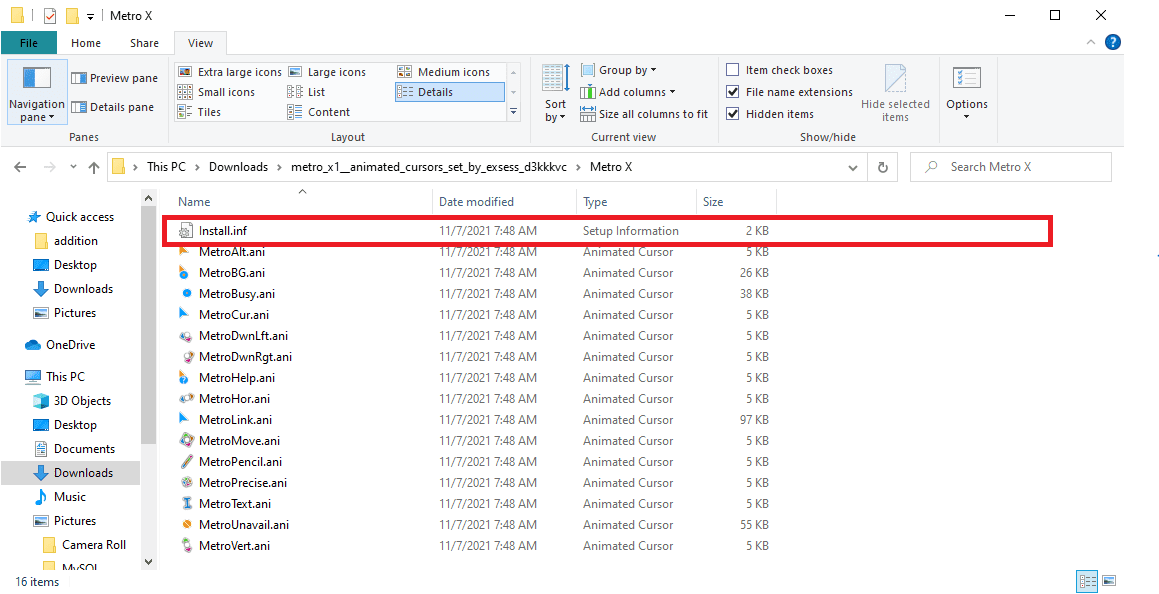
install file
Note: Install file name defers depending on the mouse cursor scheme you are using.
After locating the install file (Ending with INF extension), right-click on the file and click the “Install” option as illustrated below:
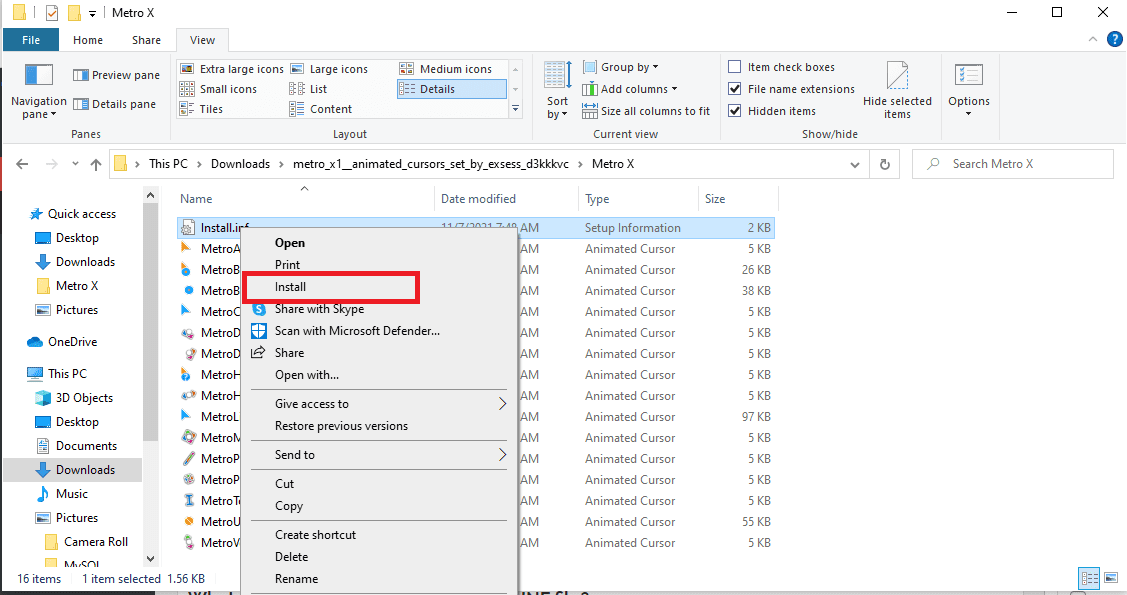
right-click and select the install option
As usual, Windows 10 will open a User Account Control prompt commonly referred to as the UAC prompt. This prompt requires confirmation to allow the installer to make changes on your device. To proceed, click “Yes”. If you use an administrator account, you must provide the admin password to move to the next step.
Give the installer a while to complete the installation process. Once it finishes installing the custom mouse pointer scheme, the mouse properties tab will automatically open and select the pointers tab. Now you can scroll through the “Scheme” section and choose a pointer you feel suits you.
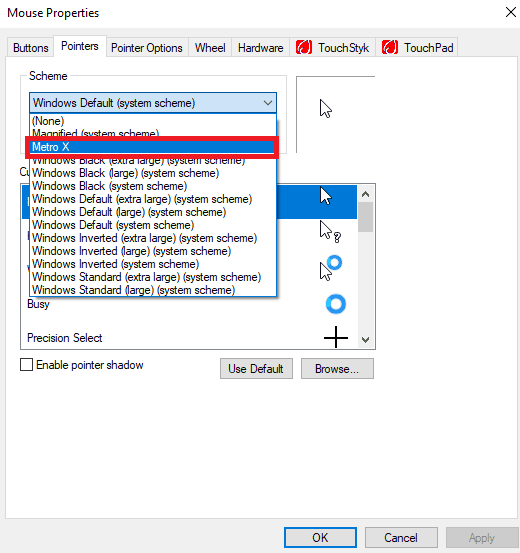
Metro X mouse cursor scheme under the scheme section
The customize section contains a drop-down list of pointers included in the installed mouse pointer scheme. Select the one you feel is good enough and click the Apply > OK buttons to save your changes.
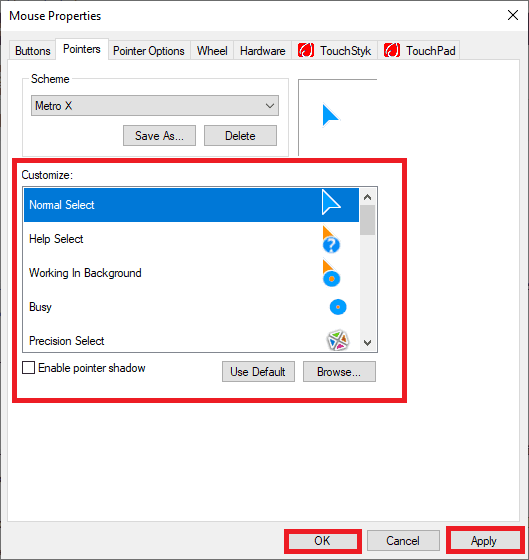
Select the mouse cursor that suits you from the customize section
Enjoy your new mouse pointers.
What should I do when I don’t find the .INF file?
Occasionally, you might try locating the install file on your downloaded cursor scheme in vain. However, if this is the case, don’t freak out since we shall be covering all the possible fixes.
If at any instance you fail to find the installer file on your cursor scheme folder, then it means, to install the cursor scheme, we shall use the second front, manually setting specific pointers.
As promised, this process won’t be hectic. Most users fear doing installations manually, but we guarantee that this won’t be the case as you will enjoy and have more room for extra customizations.
Manual installation always comes in handy whenever you want to create your cursor scheme. Also, this happens when you don’t find a scheme you like from the downloaded schemes. The beauty of manual installation is that it allows you to mix and match icons to develop your own blend. Stick to the article to learn and understand manual installation.
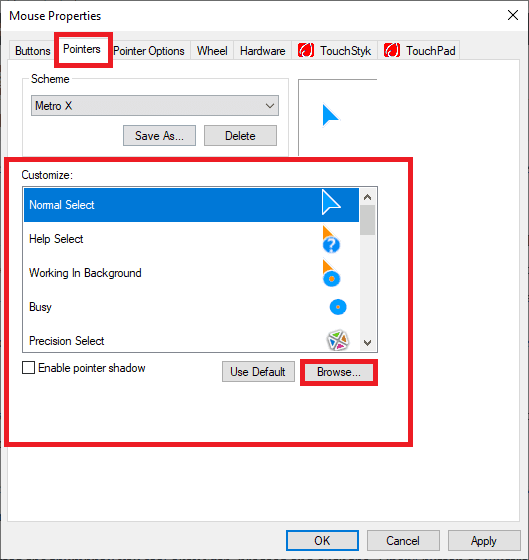
Navigate to the “Mouse Properties > Pointers > Customize” and click on the entry you want to modify. Next, click on the “Browse” option.
Manual installation using the browse option
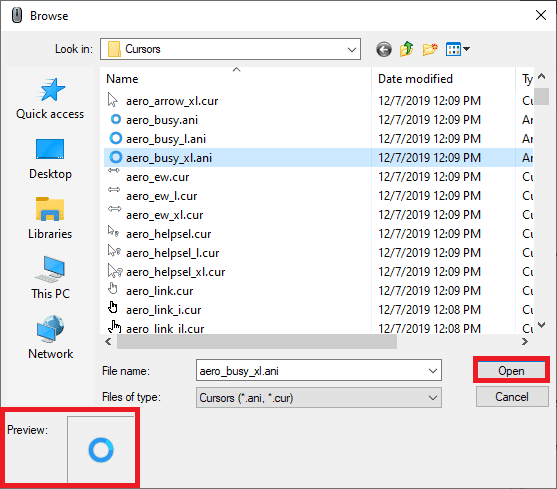
The Browse option will open the “C:WindowsCursors” folder, the primary store for all available cursor icons. Now scroll and locate the thumbnail you feel satisfies your needs.
Note: Some thumbnails look similar. Therefore, to differentiate, click on them and check out the “Preview” section at the bottom of the folder.
Once you have selected the thumbnail you feel okay with, proceed and click the “Open” button as illustrated below:
Select cursor and check the preview option
Tip: To quickly navigate through manual installations, ensure you choose a scheme closer to the pointer you want and replace the icons with the thumbnails as illustrated above.
If you change your mind and would love to revert to the original default cursor, click the “Use Default” option and click on “Apply” to save changes. The scheme will be reset to the default Windows 10 pointer. Also, it is fundamental to understand that whenever you click the “Use Default” option, all the changes you had previously made are discarded.
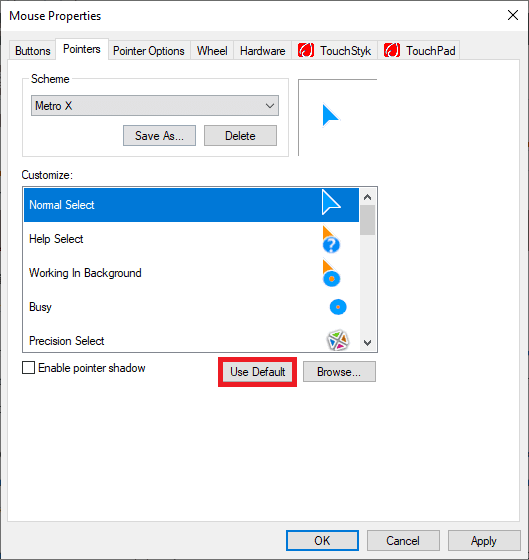
Use the default option to revert to the normal Windows 10 mouse pointer
Note: When you choose a custom mouse cursor to replace the default Windows 10 cursor scheme, Windows will treat the changes you make as a new scheme. Hence to save the scheme, click on the Save As button in the “Scheme” section. Next, provide a name to your scheme before. Once you are done, click the “OK” button.
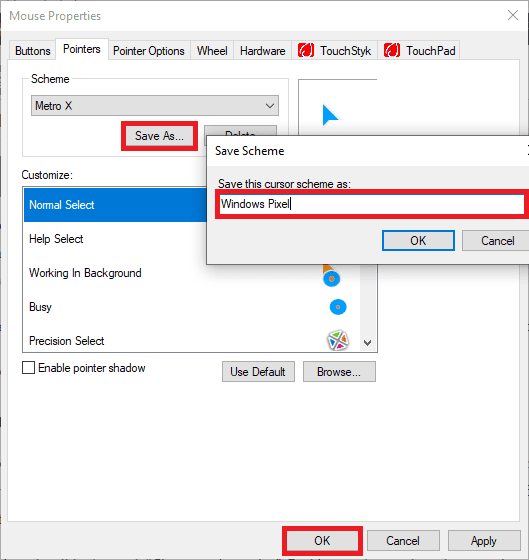
Save the scheme
Deleting any custom saved scheme is easy. Just pick it and click the “Delete” button on the “Scheme” section.
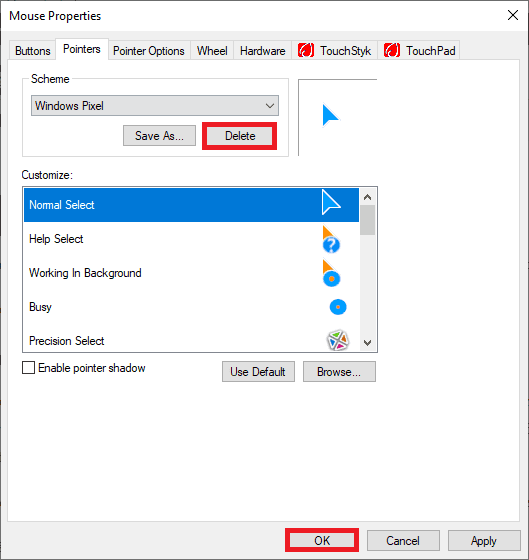
Delete the scheme
Note: You cannot delete system schemes.
Changing the mouse pointer size
After selecting and creating a custom pointer that suits your needs, you might be obliged to change the mouse’s color and size. Go to the “Start Menu” and search for “Ease of Access”, and select the “Cursor & Pointer” tab. By default Windows 10 provides a variety of colors and sizes you can choose from.
To change the size, drag the slider beneath “Change pointer size”. Besides, to change the color, you have several options:
- Use the change painter color to select premade pointers with colors
- Use the suggested pointer colors, where you can click on any provided color given.
- Finally, you can use the “Pick a custom pointer color” option, which gives you the ability to select any color of your choice.

Mouse Pointer size and color
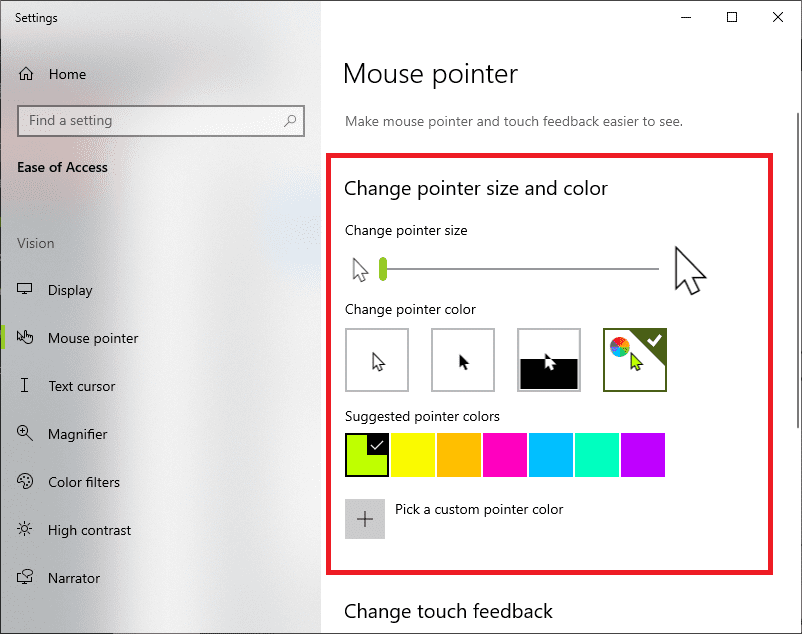
As simple as that, you can set the color and size of your mouse pointer to suit your preference.
How to change the mouse pointer scheme on Windows 10 without installing new mouse schemes?
Some users would prefer changing the mouse cursor scheme and replacing them with an existing mouse cursor scheme without installing a new mouse scheme. To do so, tail the steps provided below:
Step 1: Open “Start Menu”, and type “Mouse”, then search.
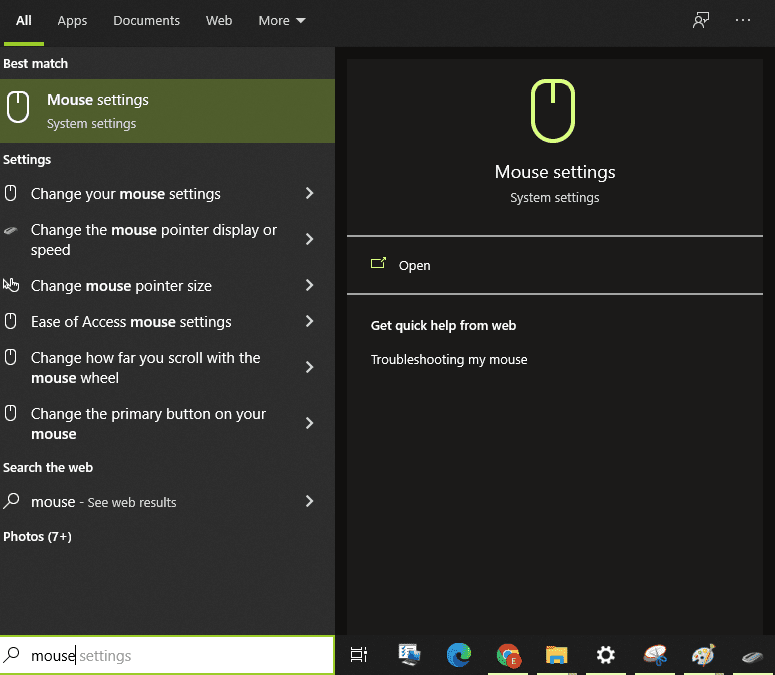
Mouse settings
Step 2: Scroll down and click on “Additional mouse options” under the “Related settings” section.
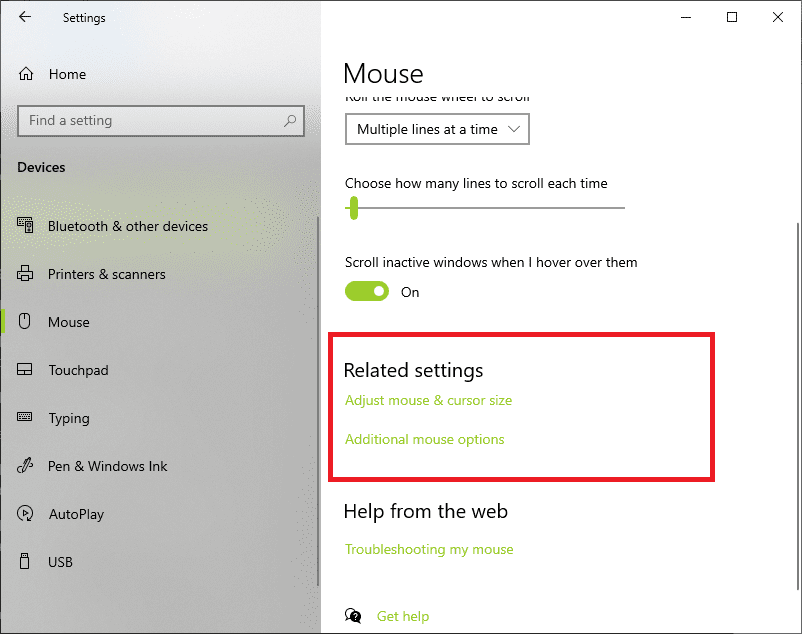
Additional mouse settings under Related settings
Step 3: The “Mouse Properties” window will open. Select the “Pointers” tab
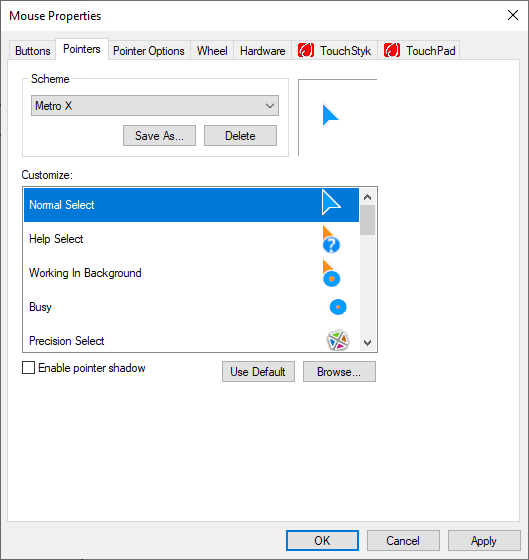
Mouse properties and pointers tab
Step 4: Under the “Scheme” section, select the drop-down arrow as highlighted in the image below:
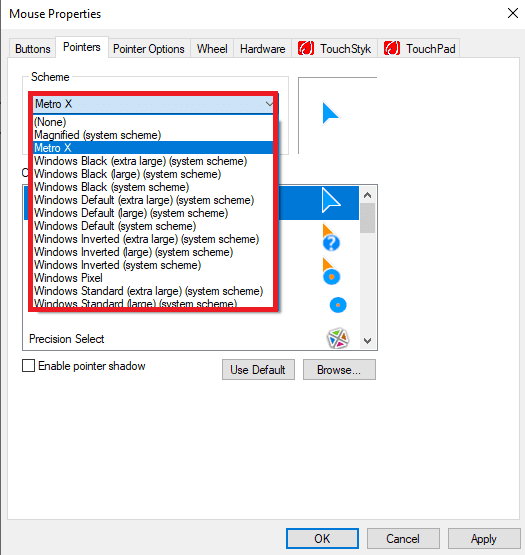
Choose the mouse cursor pointer from the scheme section
Step 5: A list of pre-installed pointer schemes will be displayed with the “Windows Default (system scheme) highlighted if you still use the default Windows 10 pointer scheme.
Step 6: From the provided list, you can select a pointer scheme that suits you and click on “Apply” to save changes.
Conclusion
We now firmly believe you can install new custom mouse pointers on your Windows 10 PC. As stated earlier, the process is relatively more straightforward than you might think. We hope this concise guide was clear enough to solve your problem. If you face any challenges, please let us know via the comments sections, and we shall do our best to reach out as soon as we can.
1 comment
Nice tutorial